Looking for an epic done-for-you 7 day itinerary for Glacier National Park? Look no further. In this national park itinerary, you’ll learn how to spend a week in Glacier National Park, including some of Glacier’s most epic day hikes, family-friendly hikes, a beach day, white water rafting and more.

Day 1: Arrival
On your first day in the Glacier National Park area, you’ll spend the day arriving and settling into your accommodations. If you have the option, I recommend flying into Kalispell, Montana, as it’s the closest airport to Glacier National Park. And, you probably don’t want to spend your entire first day driving. Better yet, I recommend flying into Kalispell as early in the day as possible to avoid driving and settling into your accommodations in the dark, especially if you’re camping.
Before heading to your hotel or campsite, pick up groceries at the Walmart in Kalispell. Even if you’re planning on eating out for every meal, you’ll want to have some easy snacks on hand during your hikes and long drives. You can see my exact road trip grocery list here. If you’ll be backpacking or camping and need a isobutane tank for your camp stove, stop at Kalispell’s REI too. Also, depending on what time your flight arrives, you may want to pick up a quick lunch in Kalispell. We picked up Jimmy John’s before getting groceries.
Then, drive to your accommodations. We car camped for free (check out our SUV camping setup here) about 10 minutes outside of the Glacier National Park boundary at Flathead National Forest’s Middle Fork Flathead River Dispersed Camping. The campground was primitive (no facilities or hookups), but the view was gorgeous. It’s right on the Flathead River, and you can camp right by the water if there’s space available. The campground was busy when we were there in mid-August, which made us feel safe.
Day 2: Going-To-The-Sun Road
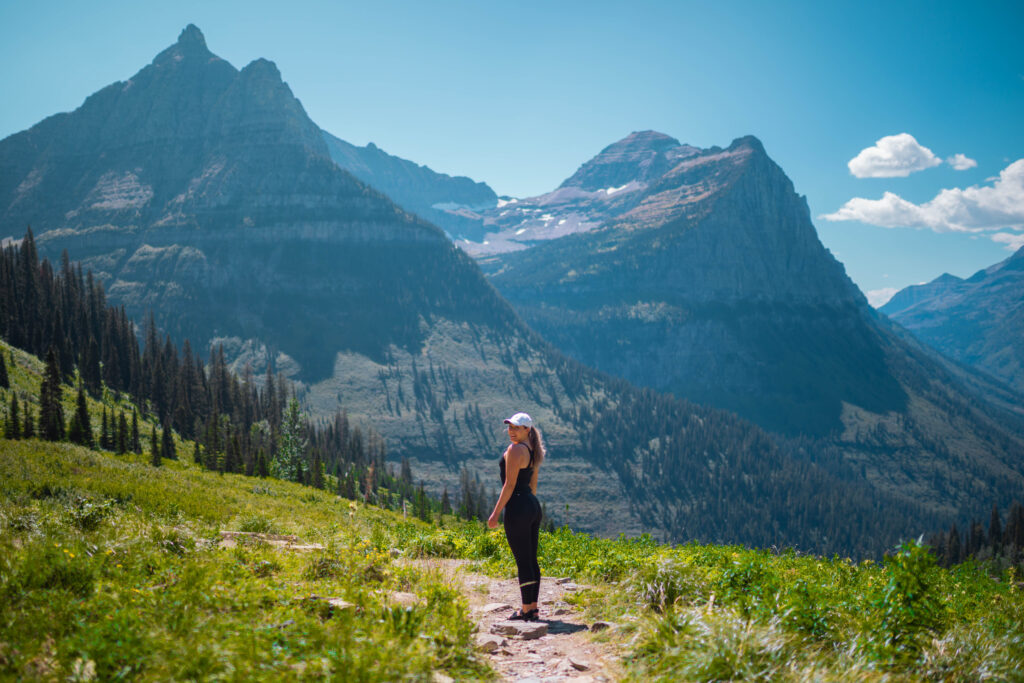
One day two, your first full day in Glacier National Park, you’re going to start bright and early to head up to Logan Pass. The Logan Pass Visitor Center parking lot fills up by 6:30 a.m. every day, so if you’re driving yourself (as opposed to taking the shuttle), you need to get there early. Otherwise, prepare to circle for a parking spot and/or add mileage to your hikes to make up for parking elsewhere. We even saw a few cars at Logan Pass who prepared breakfast right from their parking spot in order to get to Logan Pass as early in the morning as possible.
Hidden Lake Overlook

From Logan Pass, right behind the visitor center, you’ll take your first hike of the week: Hidden Lake Overlook. This is a quick 2.7 mile out-and-back hike with 551 feet of elevation gain. During the whole hike, you have 360-degree views of the mountains. At the overlook, you’re rewarded with a beautiful mountain view over a turquoise lake. Mountain goats are also known to hang out here. We saw at least 10 of them.
If you’re feeling eager, you can also hike down to the shore of Hidden Lake. The full Hidden Lake Trail is about 5.1 miles with over 1300 feet of elevation gain. Meaning, the full hike is very steep with a handful of switchbacks on the way back up from the lake. Although, you do see a beautiful reflection of the mountain on the water from below. Plus, you can jump into the lake for a quick cold plunge if you’d like.
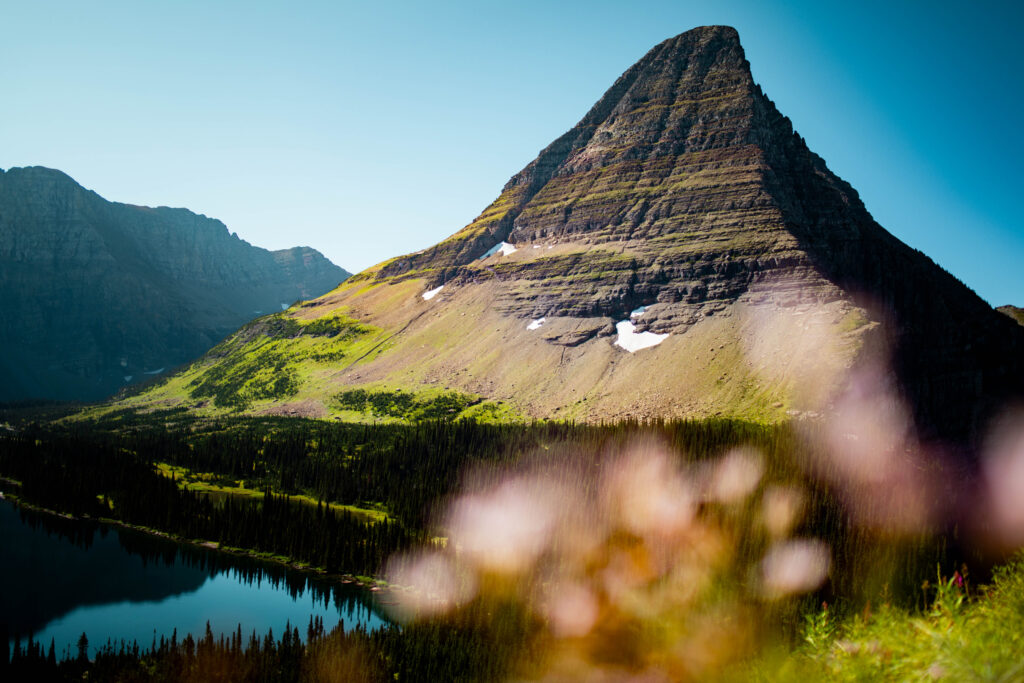
Do I personally think the hike all the way down to Hidden Lake is worth it? Not really. It’s only worthwhile if you have the time and really want to add the extra mileage. You get the best view at Hidden Lake Overlook, which was one of our favorite hikes of the week.
Afterward, check out the Logan Pass Visitor Center for souvenirs, snacks and a mini museum exhibit before giving up your precious parking spot.
Scenic Drive
Following your stop at Logan Pass, you’re going to take the famous Going-To-The-Sun Road scenic drive. This is hands-down one of the best national park scenic drives I’ve ever taken. You’re surrounded by massive-mountains, roadside waterfalls, heart-racing drop-offs and, if you’re lucky, wildlife sightings.
Because you’ll be making longer stops on Going-To-The-Sun Road throughout the majority of the week, I encourage you to take a couple hours to just drive it this day. Feel free to stop at any quick pull-offs for photos and views along the way. I highly recommend downloading the Shaka Guide audio tour for Going-To-The-Sun Road for a self-paced GPS-enabled audio tour to learn more about the area, native history and construction of the historic drive.

One thing to know, Going-To-The-Sun Road has timed entry reservation requirements from 7:00 a.m. to 3:00 p.m. each day. Reservations are extremely competitive and can book out weeks in advance. Thankfully, the reservation loophole is to enter the reservation area at Apgar Village before 7:00 a.m. (which you’ll want to do anyway for parking). If you opt for the loophole and do not have a timed entry reservation, know that you will not be able to reenter the area (Apgar Village to St. Mary) before 3:00 p.m. if you choose to leave. But, as long as you stay on Going-To-The-Sun Road before 3:00 p.m., you’re good!
Sunrift Gorge + Baring Falls
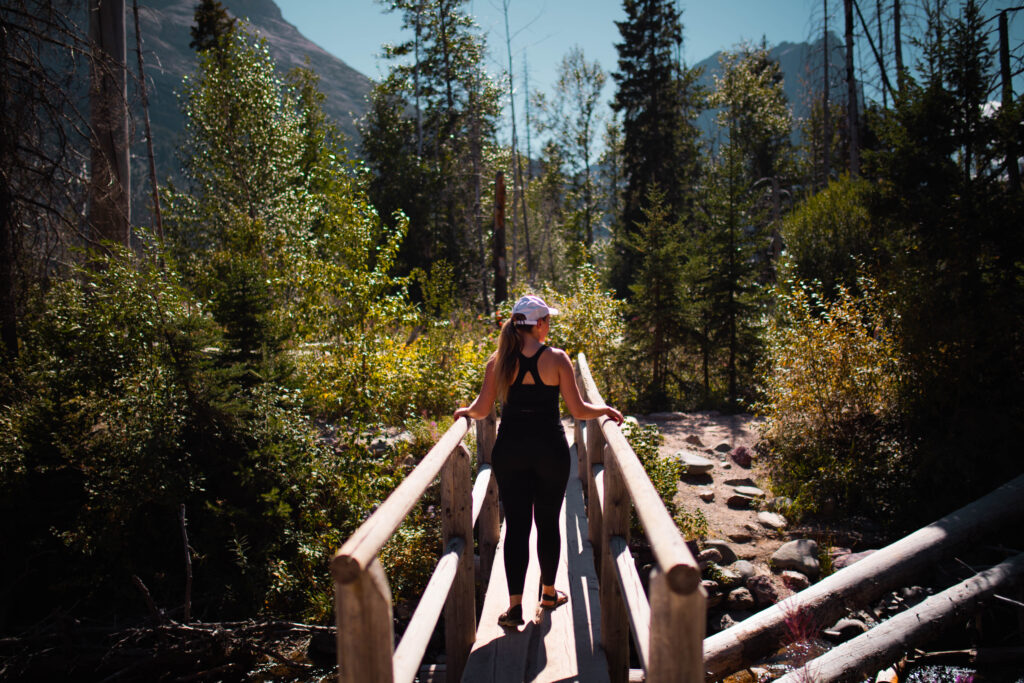
Toward the St. Mary end of Going-To-The-Sun Road, you’ll pass Sunrift Gorge and the Baring Falls hike. Sunrift Gorge is a quick staircase away from the parking lot, and Baring Falls is a short 0.7 mile round-trip hike with a little over 110 feet of elevation gain. The Baring Falls hike eventually leads you over a cute footbridge to a lovely waterfall. If you’re up for another short hike, Baring Falls is worth it. If not, you’re not necessarily missing out on Glacier’s best. No FOMO needed. Pro tip: the Sunrift Gorge overlook and Baring Falls trailhead are connected under the vehicle bridge if you want to save yourself a little stair elevation gain.
Day 3: Many Glacier
On day three of your 7 day Glacier National Park itinerary, you’ll head to the Many Glacier area of Glacier National Park, check out the historic Many Glacier Hotel and do your first hard hike of the week. Start your day early again, as you’ll need as much daylight as possible for today’s hike. Don’t worry, you’ll get to sleep in tomorrow!
Grinnell Glacier Trail
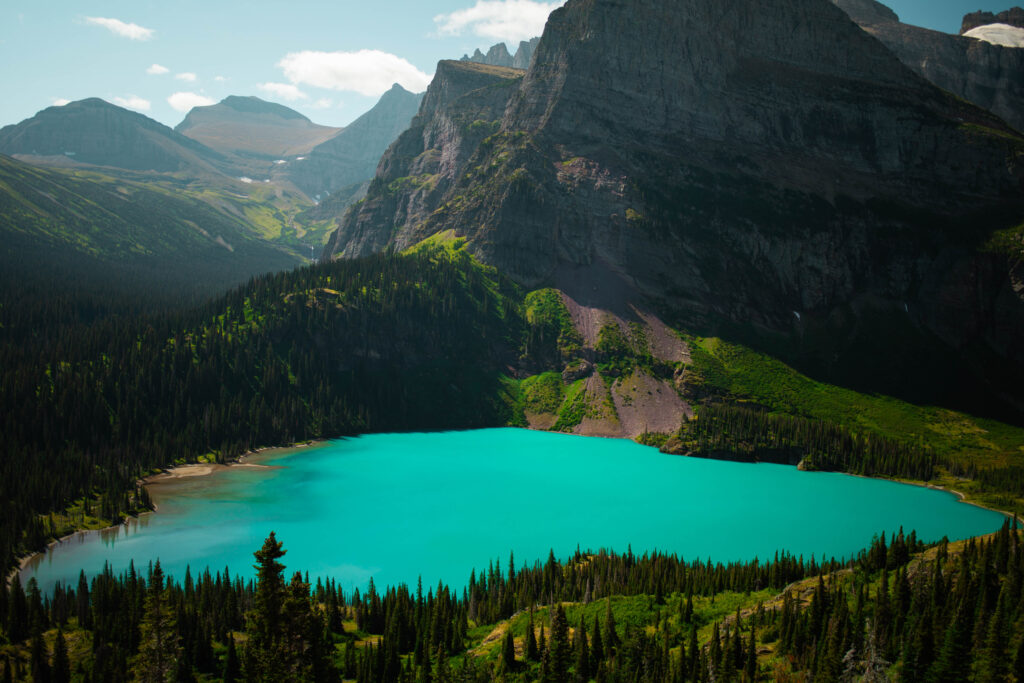
Many Glacier is home to a variety of jaw-dropping hikes — Grinnell Glacier, Cracker Lake and Iceberg Lake, to name a few. We chose to do the famed Grinnell Glacier Trail for a couple reasons. One, because it’s the most popular and, therefore, least likely for a bear encounter. Two, because there are incredible views to entertain you during the entire hike. And three, you witness four glacier-fed lakes and climb eye-level to Grinnell Glacier.
The Grinnell Glacier Trail quickly became one of my top five hikes I’ve ever done. The full trail is 11 miles out-and-back with nearly 2100 feet of elevation gain. The hike took us about eight hours at a pace of 25 minutes per mile, including resting at the top (Upper Grinnell Lake + Grinnell Glacier) for a couple of hours. You hike past Swiftcurrent Lake, Lake Josephine, Lower Grinnell Lake and Upper Grinnell Lake. About 3 miles into the hike, you see the most incredible mountain view overlooking the aqua blue Lower Grinnell Lake. At 5.5 miles, you’re rewarded with the bluest, milkiest Upper Grinnell Lake and views of Grinnell Glacier.

Although Grinnell Glacier Trail’s difficulty should not be taken lightly (and should only be attempted by experienced hikers), the payoff is so worth it. If you do not want to hike the full 11 miles, you can take boat rides past the first two lakes. These boat rides cut about 3.5 miles off of the hike, but tickets sell out months in advance. You can purchase tickets here.
Many Glacier Hotel

Whether or not you’re staying at the Many Glacier Hotel, it’s worth exploring the hotel after your long hike. The exterior of the Many Glacier Hotel looks like a picture out of a Switzerland travel guide, and the interior exudes historic luxury mountain home. If you take the spiral staircase down from the lobby, you’ll find a cafe, lounge, nice bathrooms and a water bottle filling station.
If big hikes aren’t your cup of tea, consider taking the Shaka Guide Many Glacier audio tour (2025-2026 Many Glacier construction pending), boating on Swiftcurrent Lake or hanging out at the Many Glacier Hotel regardless. Many Glacier is one of the prettiest parts of Glacier National Park!
Day 4: Lake McDonald
Congratulations, you deserve a rest day after that long hike! On day four of your 7 day Glacier National Park itinerary, sleep in a little, indulge in a slow breakfast and eventually make your way to Lake McDonald for a beach day. Note, parking in Apgar Village near Lake McDonald is limited. So, if there is no parking, you can also park at the Apgar Visitor Center and walk 10 minutes down the Apgar Bike Trail from the visitor center to Apgar Village. Feel free to stop inside the visitor center while you’re there too.
Boating On Lake McDonald
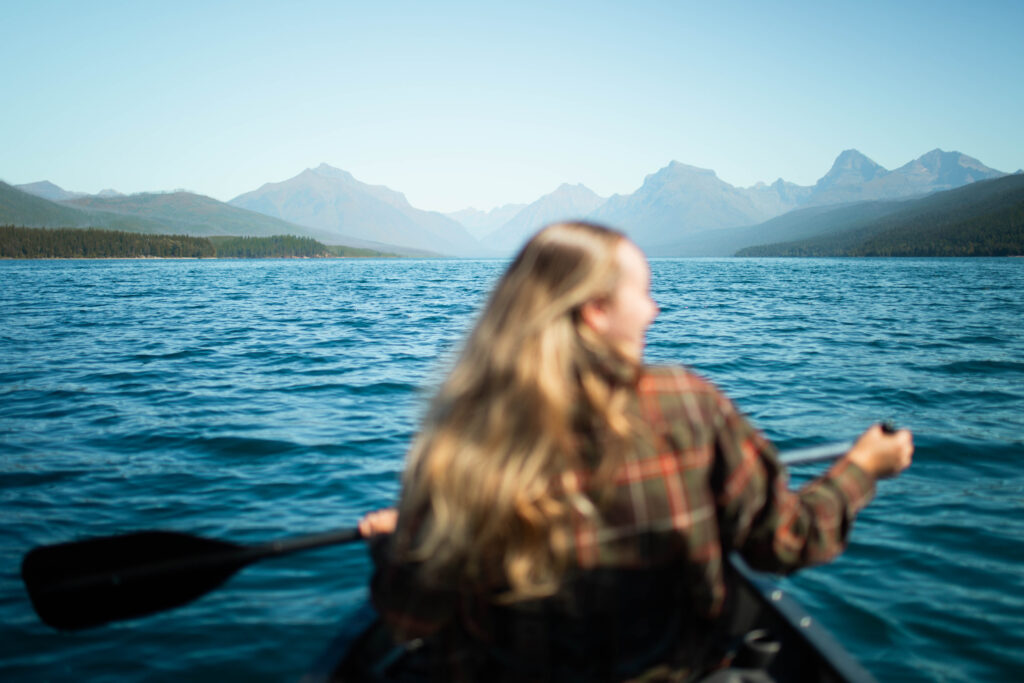
Once you get to the Lake McDonald beach access area in Apgar Village, you’ll see tons of vendors renting out kayaks, paddle boards and more. I suggest passing the village vendors and renting from Glacier Park Boat Company instead, which is located right on the water. That way, you don’t have to lug your kayak through the village to the water. We rented a canoe, but you can rent rowboats, motorboats, kayaks and paddle boards in Apgar Village. Whichever water sport you choose, you’re sure to have fun.
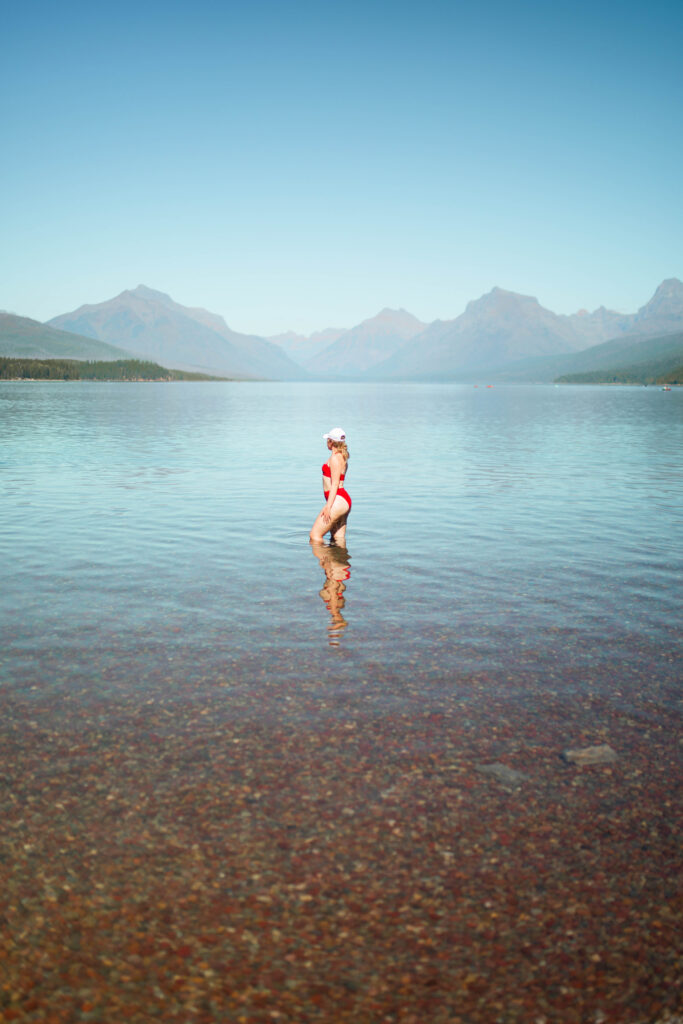
After spending some time on the water, relax on the beach, take a tanning nap and swim in the famous crystal clear water of Lake McDonald. I recommend wearing water shoes, though, as the iconic rainbow-colored rocks are hard to walk on. I personally wore my Teva Verra sandals here.
Apgar Village
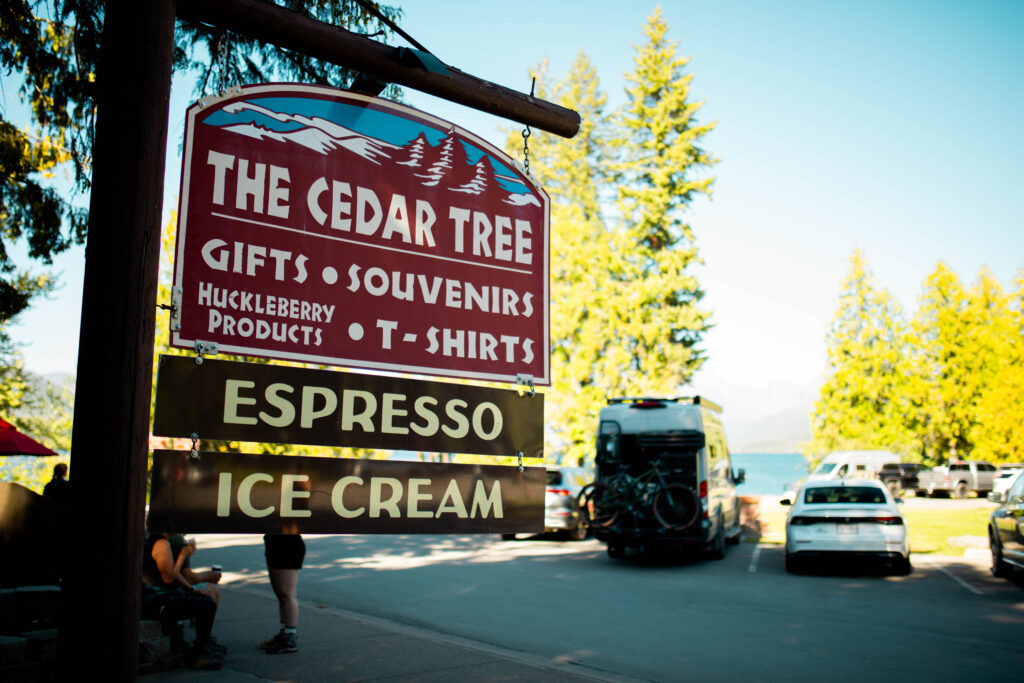
Apgar Village is a super cute mountain town right next to the beach. It’s definitely worth budgeting an hour or two in your 7 day itinerary for Glacier National Park to spend some time here. There is a super cute walk-up coffee window right next to the beach, numerous souvenir stores, a restaurant and a walk-up ice cream window in Apgar Village. The village is small and easily walkable, so there’s no need for your car here.
Polebridge Mercantile
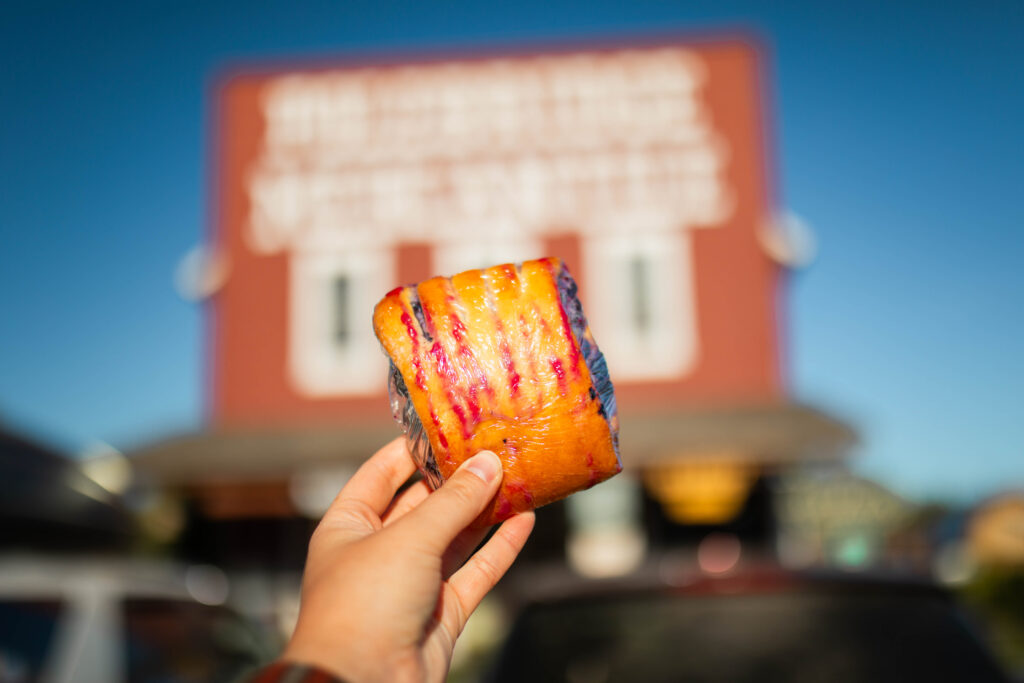
Finally for day four, an optional add-on to your Lake McDonald beach day is to venture outside of the national park to the historic Polebridge Mercantile. Here, they sell basic camp supplies. But, what Polebridge Mercantile is really known for is their huckleberry bear claws and other local pastries. However, it is a 45 minute drive to and from the national park boundary (West Glacier), so it’s up to you whether or not the huckleberry pastries are worth the journey. We personally didn’t think the drive was worth it, as the pastries were somewhat average in our honest opinion. In fact, we both preferred the non-huckleberry pastry to the famous huckleberry bear claw. But, the mercantile is a historic, touristy thing to do, nonetheless — thus why it’s an optional itinerary add-on.
Day 5: Avalanche Lake + Trail Of The Cedars
After a well-rested day four, you should start your day early again on day five. Like Logan Pass and most of the Glacier National Park trailhead parking lots, you can expect the Avalanche Lake and Trail Of The Cedars trailhead parking lots to fill up by 7:00 a.m. In fact, Kenny and I left our campsite right away in the morning, arrived at the trailhead around 6:30 a.m. to get a spot (the first parking lot was already full), and got ready for the day in the parking lot. Anyway, the Avalanche Lake and Trail Of The Cedars hikes are definitely worth the parking lot prowl.

Avalanche Lake and Trail Of The Cedars are connected. Trail Of The Cedars is a short, flat 0.9 mile loop trail that is mostly on boardwalk with very minimal elevation gain (49 feet). Connected to this loop trail, there is a spur trail for the longer Avalanche Lake hike. With Avalanche Lake, both trails come to a total of about 6 miles and 760 feet of elevation gain.
The trail to Avalanche Lake is in beautifully dense forest until you come to the main feature, a perfectly teal glacial lake that is surrounded by mountains and waterfalls. It’s stunning. Actually, Avalanche Lake reminded me a lot of Olden, Norway. This hike was a trip highlight for us. Plus, its one of Glacier National Parks’s few family-friendly hikes.

Afterward, you have a free afternoon to chill by Lake McDonald, bike around Apgar Village, souvenir shop near Lake McDonald Lodge (try a huckleberry cream soda from the camp store), take an afternoon tour or relax at your accommodations.
Day 6: White Water Rafting
One of the most fun things to do in Glacier National Park besides hiking is to take a white water rafting tour. We rafted down the Middle Fork Flathead River with Glacier Raft Co., and we had an incredible experience. Although you’ll definitely get wet and cold (dress accordingly), the rafting here isn’t too intense. In fact, Kenny and I shared a raft with a family of young kids (maybe 8 years old and up), and the kids didn’t seem scared at all. Our rafting trip in Banff was much more thrilling that this one, which may be a good sign if you’re nervous to raft. The tour was very professional, our guide was knowledgeable, and we felt totally safe on our half-day tour.
After your tour, hang out in West Glacier. Glacier Raft Co.’s meeting spot is right in central West Glacier, so you won’t even have to give up your parking spot to enjoy the town. There’s a variety of souvenir stores (the largest variety I saw in the whole park), a gas station, camp stores, restaurants and coffee shops. We ate burgers at Freda’s Bar, took advantage of their outdoor seating and enjoyed a flavored iced coffee from their walk-up coffee window.
Day 7: Rain Day
If there’s one lesson I’ve learned on past road trips, it’s do not overwhelm your itinerary. I strongly advise against filling up every minute of every day, especially if you’re camping. Everything seems to take longer on road trips. Between bathroom breaks, gas station stops, setting up camp, tearing down camp, eating out, packing lunches, prepping for hikes, etc., everything you do on a road trip takes more time than you think. This is why I’ve learned (the hard way, unfortunately) that adding a buffer day really enables you to enjoy your road trip more.
In this case, for Glacier National Park, this buffer day also serves as a rain day. This means you’ll have an entire day to shift your itinerary around for weather. It’s also helpful to have a buffer day for your Glacier National Park itinerary due to timed entry reservations, competitive hiker shuttle tickets, permits, etc. that the park requires in case you score a competitive reservation last minute and need to change your itinerary around for it.

If you get lucky with perfect weather all week long and no have any hassle with permits/reservations, here are a few ideas to spend your free day. One, you could hike the famed 15-mile Highline Trail to Grinnell Glacier Overlook from Logan Pass (start early). We did the first mile of the Highline Trail on the afternoon of our free day, which is where the “scary” part of the hike is. It was a fun adrenaline rush. Two, you could head to the quieter Two Medicine area of the park for a Shaka Guide audio tour (we also did this on our free day) or the 11-mile Upper Two Medicine Lake and Dawson Pass Loop Trail (start early). And/or three, you could go cliff jumping at Red Rock Point.
Day 8: Departure
Finally, you’ll end your week in Glacier National Park. If you’re flying out of Kalispell, note that the car rental return is a little confusing. We did not see any car rental return signs nor parking spots designated for specific car rental companies. As far as we know, there was only one return area to park, and all of the rental companies returned cars in this area. Other renters were confused about this too — as were we — so I wanted to give you a heads up. Also, it is a small airport, but the security line was slow when we were there. So, I still recommend arriving to the airport two hours before your flight.
What do you think of this 7 day itinerary for Glacier National Park? This was our exact itinerary, so I know you will love it as much as we did! Enjoy!
More Glacier National Park Guides
Packing For Hiking Vacation In Glacier National Park
The Ultimate Road Trip Grocery List
Best SUV Camping Setup For Maximum Comfort
Save This 7 Day Glacier National Park Itinerary
Save this 7 day Glacier National Park itinerary for easy access later by sharing to socials.


Leave a Reply