Flying for the first time can be extremely nerve-wrecking. From navigating the airport to checking bags to actually flying, there are many stressors that first-time flyers face. Today, my goal is to ease these nerves with this in-depth flying for the first time step-by-step checklist.
Every time I’m in the airport, I question how newbies possibly get through the airport without having a panic attack. I was lucky enough to be raised by an airline pilot, so airports and flying come as second nature to me.
So, now, I want to relay my 24+ years of flying experience with you.
Here, you’ll learn exactly how to prepare for your flight, how to navigate the airport, how to go through security, as well as everything you need to know about the flight itself.
If I had to start traveling all over again, this is exactly what I would want to know.

1. Book Your Flight
To prepare for your flight, you need to do three primary things (besides packing): book your flight, check in online prior to your flight and know your airline’s airport terminal.
First, of course, you need to book your flight.
The easiest way to book your flight will be to book online directly through the airline’s website. All you have to do is plug in your desired travel dates and how many people you are traveling with, and you’ll be able to see all your flight and seat options.
Of course, you can also book your flight through third-party website for more budget-friendly ticket prices. Either way, it’s typically best to book your flight as early as possible.
Where should first time flyers sit?
First time flyers should sit toward the front of the plane in either the window or aisle seat.
Sitting toward the front of the plane will allow you to get situated in your seat without feeling crowded or rushed.
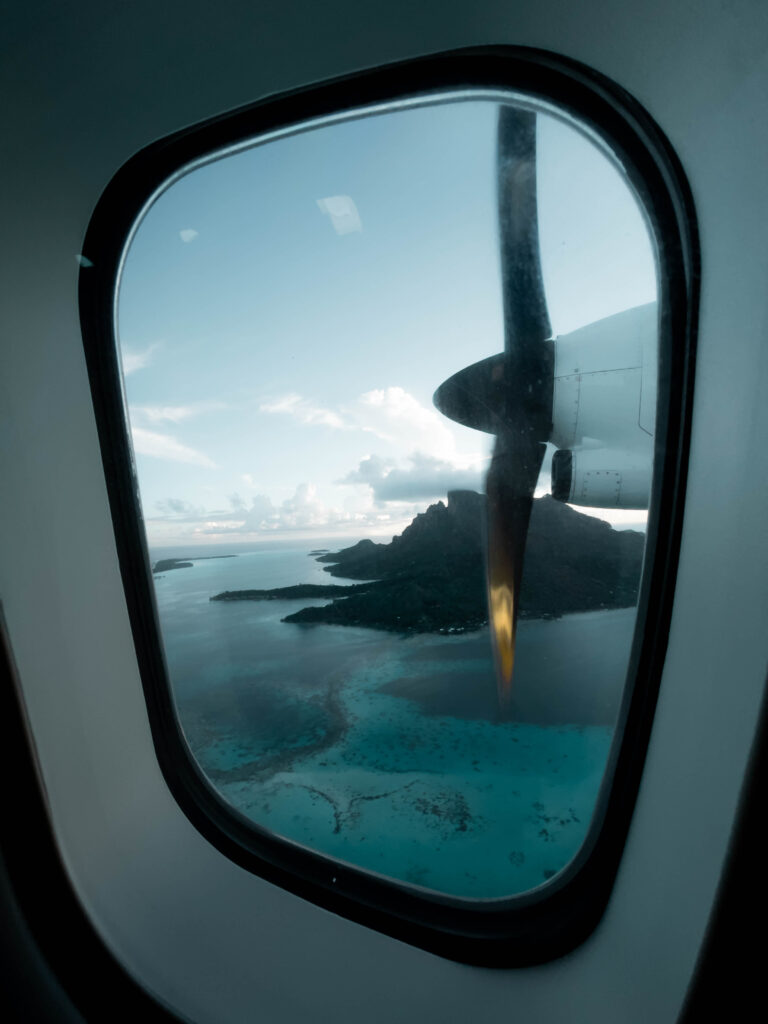
Furthermore, the window seat (my personal favorite) gives you a fantastic view of the outside of the plane and a wall to rest your head on.
Whereas, in the aisle seat, you can stretch your legs out a little more. Plus, you have easy access to the bathroom without asking neighboring passengers to move out of your way.
2. Check In Online
Once the time comes to go on your trip, you should check into your flight online prior to leaving for the airport. This will save time and stress the day-of.
Most airlines allow you to check in online 24 hours before take-off. Set an alarm so you don’t forget.
Besides saving airport time and stress, checking into your flight online as early as possible comes with several benefits:
- Some airlines have seat choices set up as first-come first-serve at check in.
- Some airlines organize boarding groups (AKA when it’s your turn to board the plane) based on first-come first-serve check ins.
- Seat upgrades are available as first-come first-serve on some airlines.
- If you are not checking a bag, you can bypass the check-in counters altogether and head straight to security.
Obviously, if you can’t already tell, the early bird tends to get the worm in terms of check-in. So, it’s always best practice to check in as soon as your flight’s check-in opens.
How do I check in for my flight?
To check in for your flight online, visit your airline’s website or search “[your airline] online check-in” 24 hours before departure.
They will typically only ask for your name and confirmation number, which you should have received when you booked the flight.
Where do you get your boarding pass?
You will get your boarding pass for your flight once you check into your flight.
If you check in early online, you will receive a digital version of your boarding pass. If you check in at the airport in person, you will receive a physical copy of your boarding pass.
Both the digital version and physical version are scannable at security and when you board.
Does a boarding pass mean you are checked in?
Generally speaking, yes, a boarding pass does mean you are checked in for your flight.
In rare cases, such as if you are flying standby, you will receive a security document at check-in. This is different from a boarding pass and does not guarantee that you have a seat on the flight. For more information about standby and non-rev flying, read my guide here.
However, this does not apply to most travelers.
Do I need to print my boarding pass?
Thanks to modern technology, you do not need to print your boarding pass at home. You can simply scan your boarding pass from your smartphone to get through security and onto the plane.
If you opt for the smartphone route, take a screenshot of your boarding pass QR code so that you still have your boarding pass to scan without internet or WiFi. Airport WiFi is often very spotty and unreliable.
If you would like to print your boarding pass but don’t own a printer, you can print your boarding pass at the airline’s check-in kiosk or counter upon arrival to the airport (which we’ll discuss more later).
3. Know Your Airline’s Airport Terminal
After you check into your flight, find out which airport terminal your flight is departing from.
You can find your airline terminal by simply searching “[your airline] terminal at [your airport]” or going to the airport’s website.
This will make navigating the outside of the airport a lot easier, especially if you’re personally driving to the airport. Airport roads tend to have a lot of signs and a lot lanes, so knowing your airline’s terminal ahead of time will help tremendously.
4. Enter The Airport By Following Signs For “Departures” In Your Terminal
Next, like I just alluded to, driving on airport property involves a lot of lanes and signage, so just remember to follow signs to “departures,” not “arrivals,” and you should be okay.
Also, if you’re driving yourself to the airport, it may be best to look up where you want to park your car beforehand. Most airports have various parking lots at various prices, so knowing which lot you want to park in can make day-off navigation smoother.
On the other hand, if you are taking a taxi, ride-share or shuttle to the airport, all you have to do is tell your driver which airline you’re flying with. They should know which terminal to take you to.

5. Locate Your Airline
Once you have parked your car and/or arrived to the correct airport terminal, look for signs for your airline.
There should be signs both outside of and inside the airport entrance, so regardless of whether you parked your car or were dropped off, you should be able to find your airline’s check-in area easily.
When in doubt, ask an airport security guard or other employee to direct you.
6. Enter The Airport And Print Your Boarding Pass
What do you do when you first get to the airport?
When you first get to the airport, head to your airline’s check-in area where there are electronic check-in kiosks and/or an in-person check-in counter. Here, you will check into your flight if you haven’t already. You will also drop off your checked baggage.
If you checked in online early, you can print physical copies of your boarding pass here. Likewise, if you’re checking any bags, you will print your baggage tags before you drop them off.
7. Drop Your Checked Bags Off
To drop off your checked bags, you will do one of two things, depending on how the airline has their baggage drop set up in your airport.
You will either:
- Bring your suitcase to the check-in counter to be weighed and taken.
- Bring your suitcase to the conveyor area labeled “baggage drop” (or something similar) to be weighed and taken.
You will likely need to show your ID when you check your bag, so make sure to have your ID easily accessible.
What identification do I need to fly?
To fly, go through airport security and check baggage, you will need to show photo identification with a state-issued driver’s license, valid passport or military ID.
If you do not show proof of identification, you will not be able to fly.
In most cases, you will either use your driver’s license (if traveling domestically) or passport (if traveling internationally).
8. Find Your Concourse
After you check your bags, the next step you’ll want to take is to figure out which concourse your flight is departing from.
To find your flight concourse, look at your boarding pass for your gate number. There will likely be a letter associated with the gate number. This letter indicates which concourse you need. For example, if your gate is C10, your concourse is C and your gate is 10.
It’s important to know the correct concourse before following the crowds to security because different concourses often have different security checkpoints. Meaning, if you go through security into the wrong concourse, you might have to exit and go through security again.
On the other hand, smaller airports usually only have one concourse and/or one security checkpoint. In this case, you don’t really need to worry about the concourse.
9. Go Through Security (Flying For The First Time Step By Step)
Next, when you follow the signs to your concourse, you will inevitably run into a security checkpoint. Without going through security, you will not be able to reach your concourse nor your gate.
Again, you’ll most likely need to show photo ID at security, so have it easily accessible. Also, have your liquids bag on top of your bag or in a front pocket so that you don’t have to dig through your bag when you’re at the front of the security line.
For more information about TSA security regulations and how to fly with liquids, check out this guide.

After the security officer scans your boarding pass (digital or physical) and ID, pick up a security conveyor bin for each of your large items.
Here’s what you will need to place in the bins at security:
- Small backpack or personal item.
- Jacket.
- Belt.
- Shoes (if between the ages 12-75 in the US).
- Hat.
- Anything in your pockets (cell phone, wallet, spare change, etc.).
- Liquids bag (varies per security officer per airport).
- Laptops and large electronics (alone in their own bins).
Basically, the only thing going through the walk-through metal detector is you and your clothes. Your larger carry-on items (suitcases, strollers, etc.) can go on the security conveyor without a bin.
Here’s what you can usually keep on your body at security:
- Watches.
- Jewelry.
- Glasses.
The security officers will tell you if they need to run anything on your body (like large jewelry pieces) separately.
After passing through the walk-through metal detector, the officers will either say you’re clear to go, or they’ll ask to do a manual check. When you’re cleared, you can recollect all of your belongings at the end of the conveyor belt.
If your bag is flagged on the conveyor, an officer will pull you and your bag aside to do a manual check. This is typically nothing to worry about. You might just have a regular household item packed that is not allowed through security (e.g. a pair of scissors, filled water bottle or pocket knife).
One time, my bag was flagged because I had an entire jar of peanut butter in my bag. Sadly, they threw the jar away. Apparently, peanut butter is considered a liquid. Lesson learned.
Can I go straight to security if I checked in online?
Yes, if you checked into your flight online and do not have any bags to check, you can go straight to security.
10. Find Your Gate (Flying For The First Time Step By Step)
After security, you can take a deep breath because the most stressful part of the airport is behind you. Now, all you have to do is find your gate before your plane boards.
Check the large flight monitors, your digital boarding pass or the airline’s app to find your flight gate.
Sometimes, there are gate changes, so be sure to listen to overhead announcements and check the monitors/digital boarding pass/app regularly.
Then, all you have to do is follow signs toward your gate number. You’ll know you’re at the correct gate when the gate agent screen says the name of your destination.
11. Grab Snacks, Drinks And Use The Restroom
After you find the correct gate, you’re free to sit, roam around the concourse, grab snacks, fill up your water bottle and use the restroom.
Just make sure to be back to your gate by boarding time (usually 30-45 minutes before departure). Your boarding pass will state your specific boarding time.
12. Board The Plane (Flying For The First Time Step By Step)
Finally, it’s time to board the plane.
How do you board a plane?
The boarding process looks a little different per airline, but, overall, you can expect to get in line according to your boarding priority (located on your boarding pass). Once you’re at the front of the line, the gate agent will scan your boarding pass. Then, you walk onto the plane, find your seat, stow your bags and relax.
You’ll either walk through a jet bridge right to the door of the plane. Or, you’ll exit the building, follow the signs/directions/crowd to the parked plane and take a staircase up to the plane’s door.
13. Find Your Seat
Next, find your seat.
Most airlines have designated seat numbers, so, in this case, you just need to locate your seat number. Some airlines, like Southwest Airlines, have open seating, which is first-come first-serve.
14. Stow Your Carry-On Bags (Flying For The First Time Step By Step)
Once you find your seat, you should immediately stow your carry-on and personal item bags.
If your carry-on bag is too large to fit underneath the seat in front of you, you will need to place it in the overhead compartment.
You can get access to the overhead compartment during the flight when the seat belt sign is off. However, it’s pretty inconvenient for yourself and those around you to dig through your carry-on in the center aisle. It’s best to have everything you’ll need in-flight by your feet inside your personal item.
Your personal item, on the other hand, should be stowed completely underneath the seat in front of you for take off. Nothing can be by your feet during take off. The flight attendants will double check for this.
For insider tips on packing the perfect personal item, check out my personal item packing list.
15. Take Your Seat And Get Buckled
After stowing your bags, take your seat and buckle up.
When the flight attendants check to make sure all your bags are stowed, they will also check to make sure your seat belt in fastened.
16. Put Your Phone In Airplane Mode And Power Off Your Laptop (Flying For The First Time Step By Step)
Once you sit down, it’s almost time to relax and enjoy the flight. There’s just one more thing you need to do.
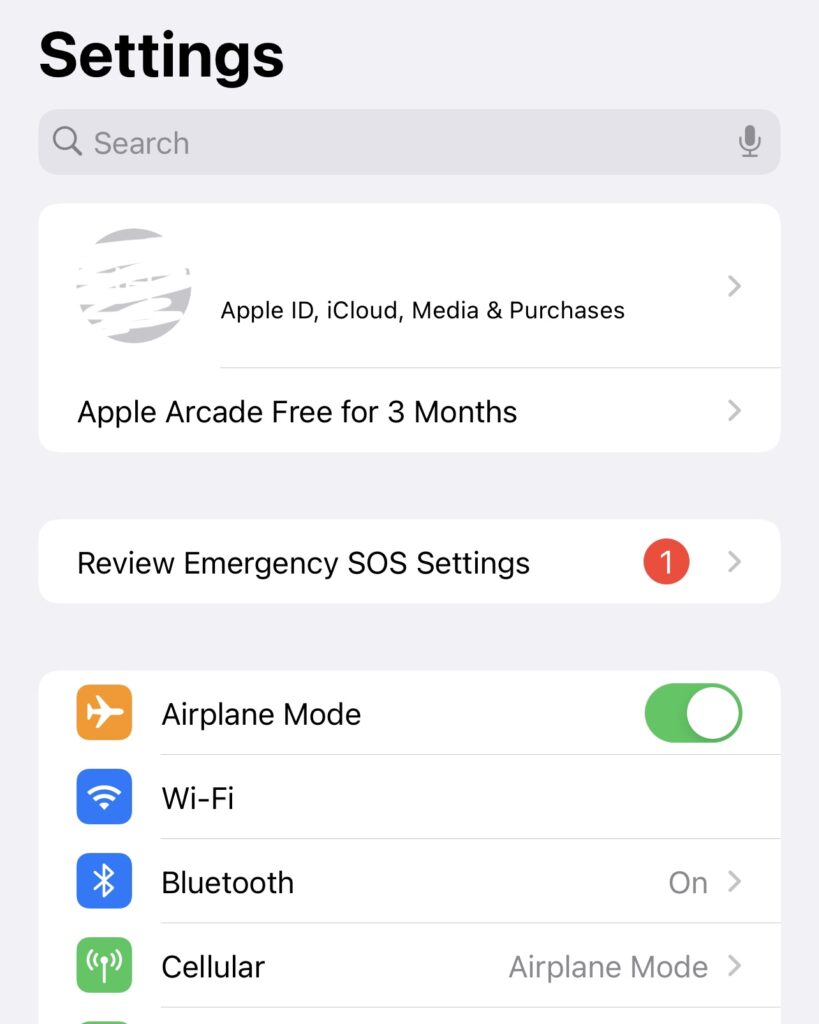
Put your small electronics (cellphones and tablets) in airplane mode, and power down your laptops.
Airplane mode will allow you to use your small electronics during the flight without interfering with the airplane’s radio signals.
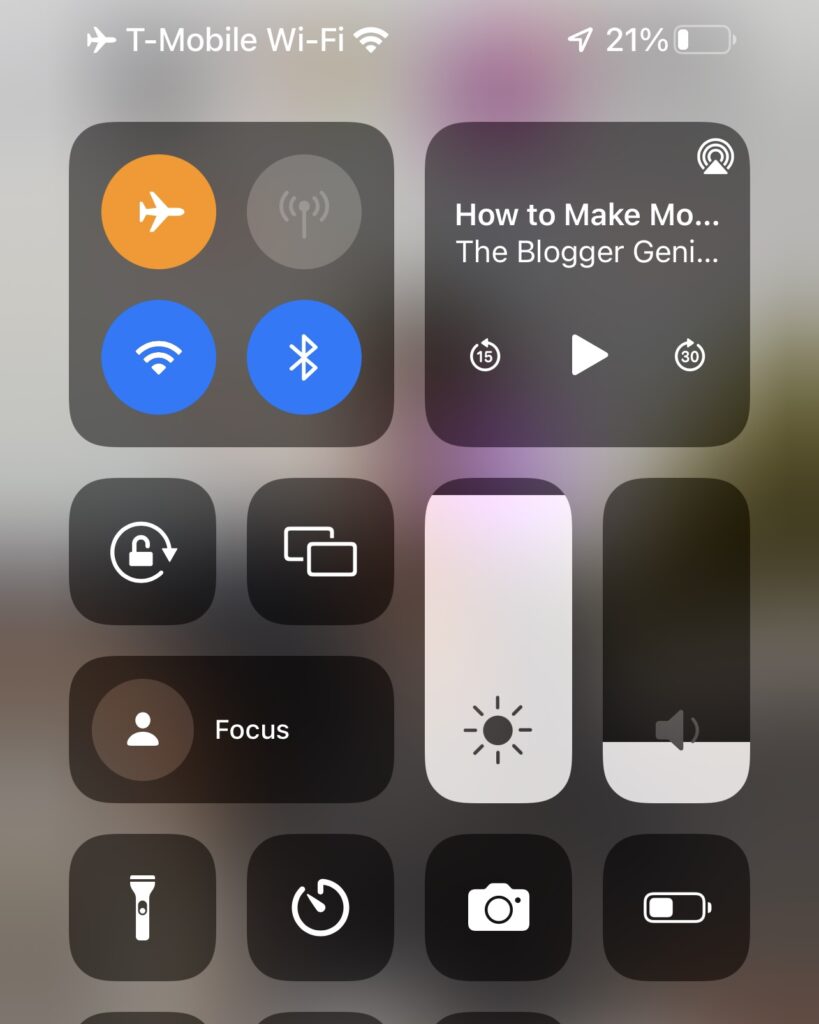
Most airplanes are equipped with paid WiFi, which you can turn on while still in airplane mode. Otherwise, here are some ideas for productive things to do on a plane ride without WiFi.
Also, you will be able to power on and use your laptop once you’re in the air after take-off. The captain will announce when you are allowed to do so.
17. Enjoy Complimentary In-Flight Entertainment And Refreshments
Finally, relax! Listen to some downloaded music, watch a downloaded movie and enjoy the complimentary in-flight services.
As for entertainment, some longer flights (usually international) have built-in individual TVs with free movies, TV shows and games to keep you occupied.
As for the refreshments, most airlines offer at least one complimentary non-alcoholic beverage and snack mid-flight. The beverage menus (including paid alcoholic beverages) can usually be found in the seat-back pocket in front of you. Longer flights will usually serve at least one complimentary meal as well.
18. Prepare For Landing (Flying For The First Time Step By Step)
Near the end of the flight, you will hear the captain and/or flight attendants announce that they are about to prepare for landing.
For passengers, all this means is that the flight attendants will be coming around to collect trash one more time. Also, you should make sure your laptop is powered off, bags are stowed and seatbelt is fastened, just like for take-off.
19. Deplane (Flying For The First Time Step By Step)
When you land, you have to stay in your seat until the captain turns off the seatbelt sign.
Even though you may be on the ground, the pilots still have to park the plane, attach the jet bridge and open the plane door.
The deplaning process itself is pretty simple. Starting with the passengers closest to the door, everyone takes their turn filing out of the plane. Obviously, make sure you have all your belongings before deplaning, as you will not be allowed back on board.
20. Follow Signs For Baggage Claim (Flying For The First Time Step By Step)
Next, when you’re back in the airport, follow the signs for baggage claim (also called baggage reclaim in some parts of the world), typically labeled with an image of a suitcase.
The other passengers on your flight will be heading toward baggage claim too (or heading to their connecting flight, in which you would repeat steps No. 10-20 instead), so, when in doubt, you can usually follow the crowd or ask for directions.
Also, regardless of whether or not you checked luggage, you’ll need to head toward baggage claim to exit the airport.
21. Check Baggage Claim Monitors For Your Flight’s Conveyer Belt
Then, if you checked a bag, check the baggage claim monitors to see which conveyer belt has your flight number when you get to baggage claim. Your baggage should be sent onto the corresponding conveyor belt.
You’ll likely recognize other passengers from your flight when you get to the conveyor belt, too, which helps you know that you’re in the right place.
22. Wait For Your Suitcase (Flying For The First Time Step By Step)
Then, all you have to do is wait for your suitcase.
Try not to stand right next to the conveyor belt while waiting because people will be pulling their heavy bags off left and right.
Moreover, always double check your luggage tag to make sure that the bag you claimed is indeed your own luggage. Accidentally taking someone else’s luggage would be a logistical nightmare for both you and the rightful owner.
23. Visit Baggage Customer Service If Necessary
In the event that your bag is not sent onto the conveyor belt, which is rare, visit baggage customer service for assistance. They will be able to give you a better idea of where your bag may be.
And, if you kept the tip of the luggage tag that you printed at check-in, this will make finding your lost luggage even easier. So, don’t lose that tag during the flight.
24. Find Your Ground Transportation (Flying For The First Time Step By Step)
Lastly, find your ground transportation and exit the airport.
If you rented a car, follow the signs to your car rental provider. Likewise, if you’re taking a taxi, you can usually get one right outside the airport doors. If you’re taking a ride-share service like Uber or Lyft, follow the signs to the ride-share pickup zone and order your ride-share.
Finally, if you want to take a train or public transportation to your next stop, there are usually ticket kiosks near the airport exit to buy tickets. If you have trouble finding the first bus stop, using Google Maps or the CityMapper app (my personal favorite) should help.
25. Enjoy Your Trip!
With out further ado, it’s finally time to enjoy your trip!
I have listed a couple first-time flyer FAQs below for you to peruse, but if you have any more questions at all, don’t hesitate to ask. No question is a stupid question when it comes to flying for the first time.
Flying For The First Time Step-By-Step FAQs
Is it scary to fly on a plane for the first time?
No, it is not scary to fly on a plane for the first time.
Although it is normal to experience some nerves, there is no reason to be scared — even if you hit a little turbulence (which is completely normal and safe, by the way)!
What do I need to know before flying for the first time?
With this guide, you already know everything you need to know before flying for the first time. But, a key thing to remember is to have your ID and boarding pass on you at all times.

Hopefully this flying for the first time step-by-step checklist has helped educate you and calm any pre-travel jitters you may have.
Again, if you have any questions, please leave a reply below or send me a message on Instagram. I am here to help!

More Flying Tips And Tricks
Personal Item Packing List: Essentials For A Great Flight
12 Productive Things To Do On A Plane Ride Without WiFi
12 Natural Motion Sickness Remedies For Immediate Relief
20 Bible Verses For Travel Anxiety
Save This Flying For The First Time Step-By-Step Checklist For Later
Save this flying for the first time step-by-step checklist for later by sharing with others.


Leave a Reply